After installing and activating RosettaPress, the first step in setting up your multilingual environment is to create individual sites for each language – then group them together using a Language Group.
RosettaPress lets you do both directly from its Language Groups interface in the Network Admin.
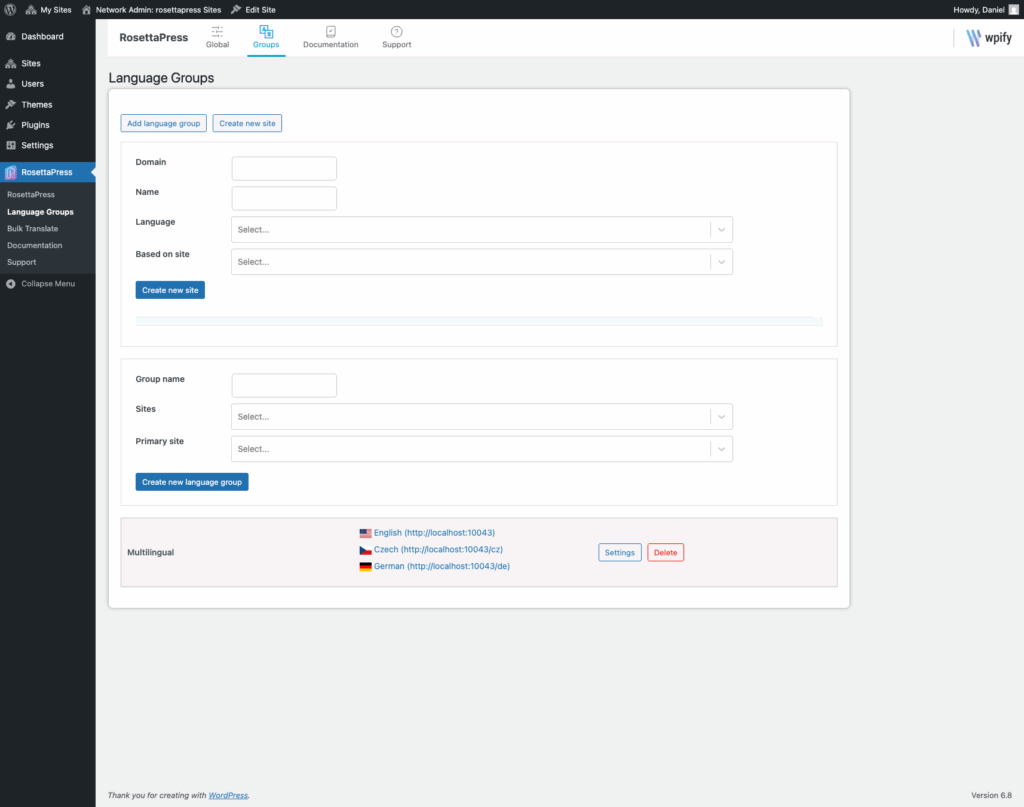
Step 1: Create Language-Specific Sites
- Go to Network Admin → RosettaPress → Language Groups.
- If no subsites exist yet for your languages, click “Create new site”.
- Fill in the following fields for each site:
- Domain – Set the URL (e.g.,
/de/,/fr/,/es/) - Name – Site title (used in the admin)
- Language – Select the language for this site
- Based on site – (Optional) Clone content from an existing site
- Exclude tables – (Optional) Skip specific database tables (e.g., analytics, cache)
- Copy users with roles – Select user roles to copy from the source site
- Domain – Set the URL (e.g.,
Click Create new site to add each one. Repeat for all required languages.
Step 2: Create a Language Group
Once your language-specific sites are created:
- Click Add New Language Group.
- Enter a Group Name to describe this set of sites.
- Add the sites you created using the dropdown.
- Choose one site to be the Primary Site — this will act as the source for cloning, synchronization, and translation control.
- Click Save Changes.
Each site can only belong to one language group, and you can manage multiple groups independently.
What’s Next?
Once your group is saved, you can:
- Enable Automatic Cloning and Synchronization
- Configure Automatic Translations
- Set up the Language Selector
- Start linking and translating content between sites
This structure lays the foundation for everything RosettaPress can do – with flexibility, performance, and clarity.