RosettaPress makes it easy to translate posts and pages across your language group. Each post or page created on the Primary Site can be cloned or linked with its translated versions on other sites in the group.
If you’ve already gone through the Quick Start guide, this section will reinforce the concepts and help clarify the workflow.
Step 1: Create Content on the Primary Site
Start by creating a new page or post on the Primary Site — the site defined as the content source in your Language Group.
You can use any built-in or custom post type. After publishing, this content becomes the reference for translations across the linked language sites.
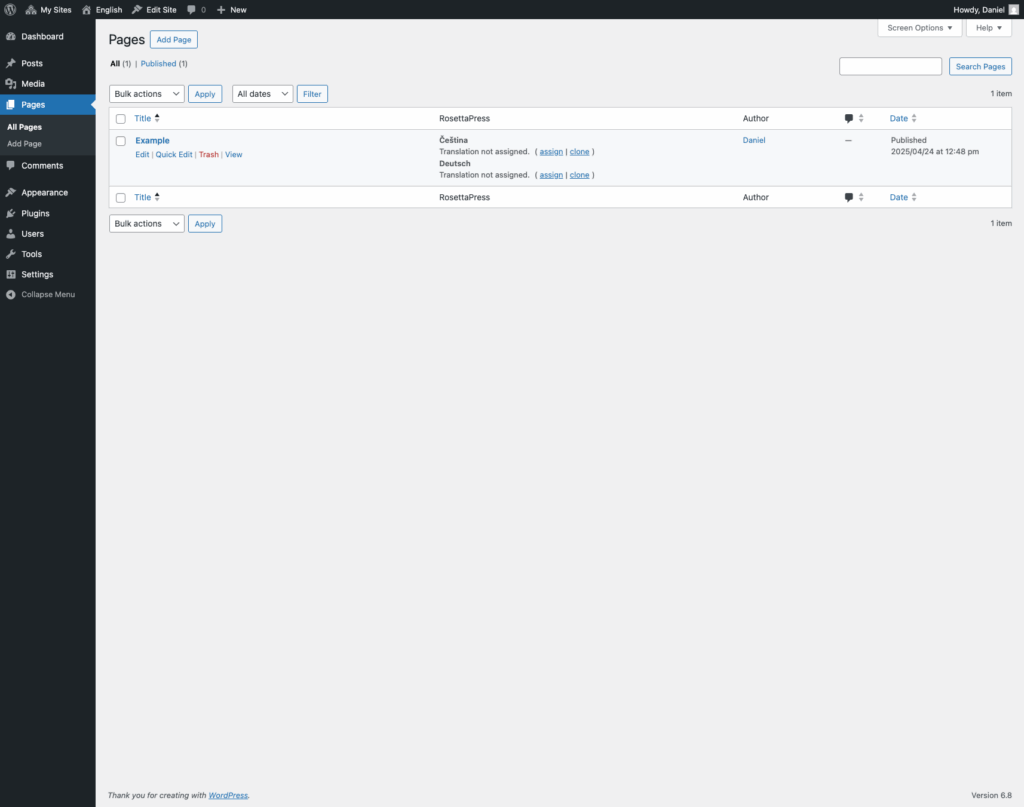
Step 2: Open the Equivalent Post Type on Other Sites
To manage translations, visit the same post type (Pages, Posts, Products, etc.) on each language site in the group. There you will see RosettaPress options for the corresponding item.
For each piece of content, you can:
- Assign: Manually link an existing item on this site as the translation.
- Clone: Automatically copy the content from the Primary Site and create a linked translation on this site.
RosettaPress keeps track of these relationships so each language version is properly connected.
Step 3: Translate and Customize
Once content is linked, open it in the editor and add the translated version of the title, content, excerpt, and any custom fields.
If you’ve enabled Synchronization or Automatic Translation, RosettaPress will help keep relevant fields in sync or pre-fill translations using your selected API.
This workflow gives you full control over how and when each translation is created, while keeping the user experience inside the native WordPress editing interface.