Once your language group is set up, you can start creating and linking translated pages across your multisite network.
RosettaPress gives you full control over your content structure — whether you want to manually create translations or automatically clone content across languages.
Step 1: Create Your Default Page
Go to your Primary Site and create a new page — for example, your homepage or about page.
- Navigate to Pages → Add New.
- Add your title and content in the default language.
- Publish the page.
This will act as the source page for your other language sites.
Step 2: Manage Translations
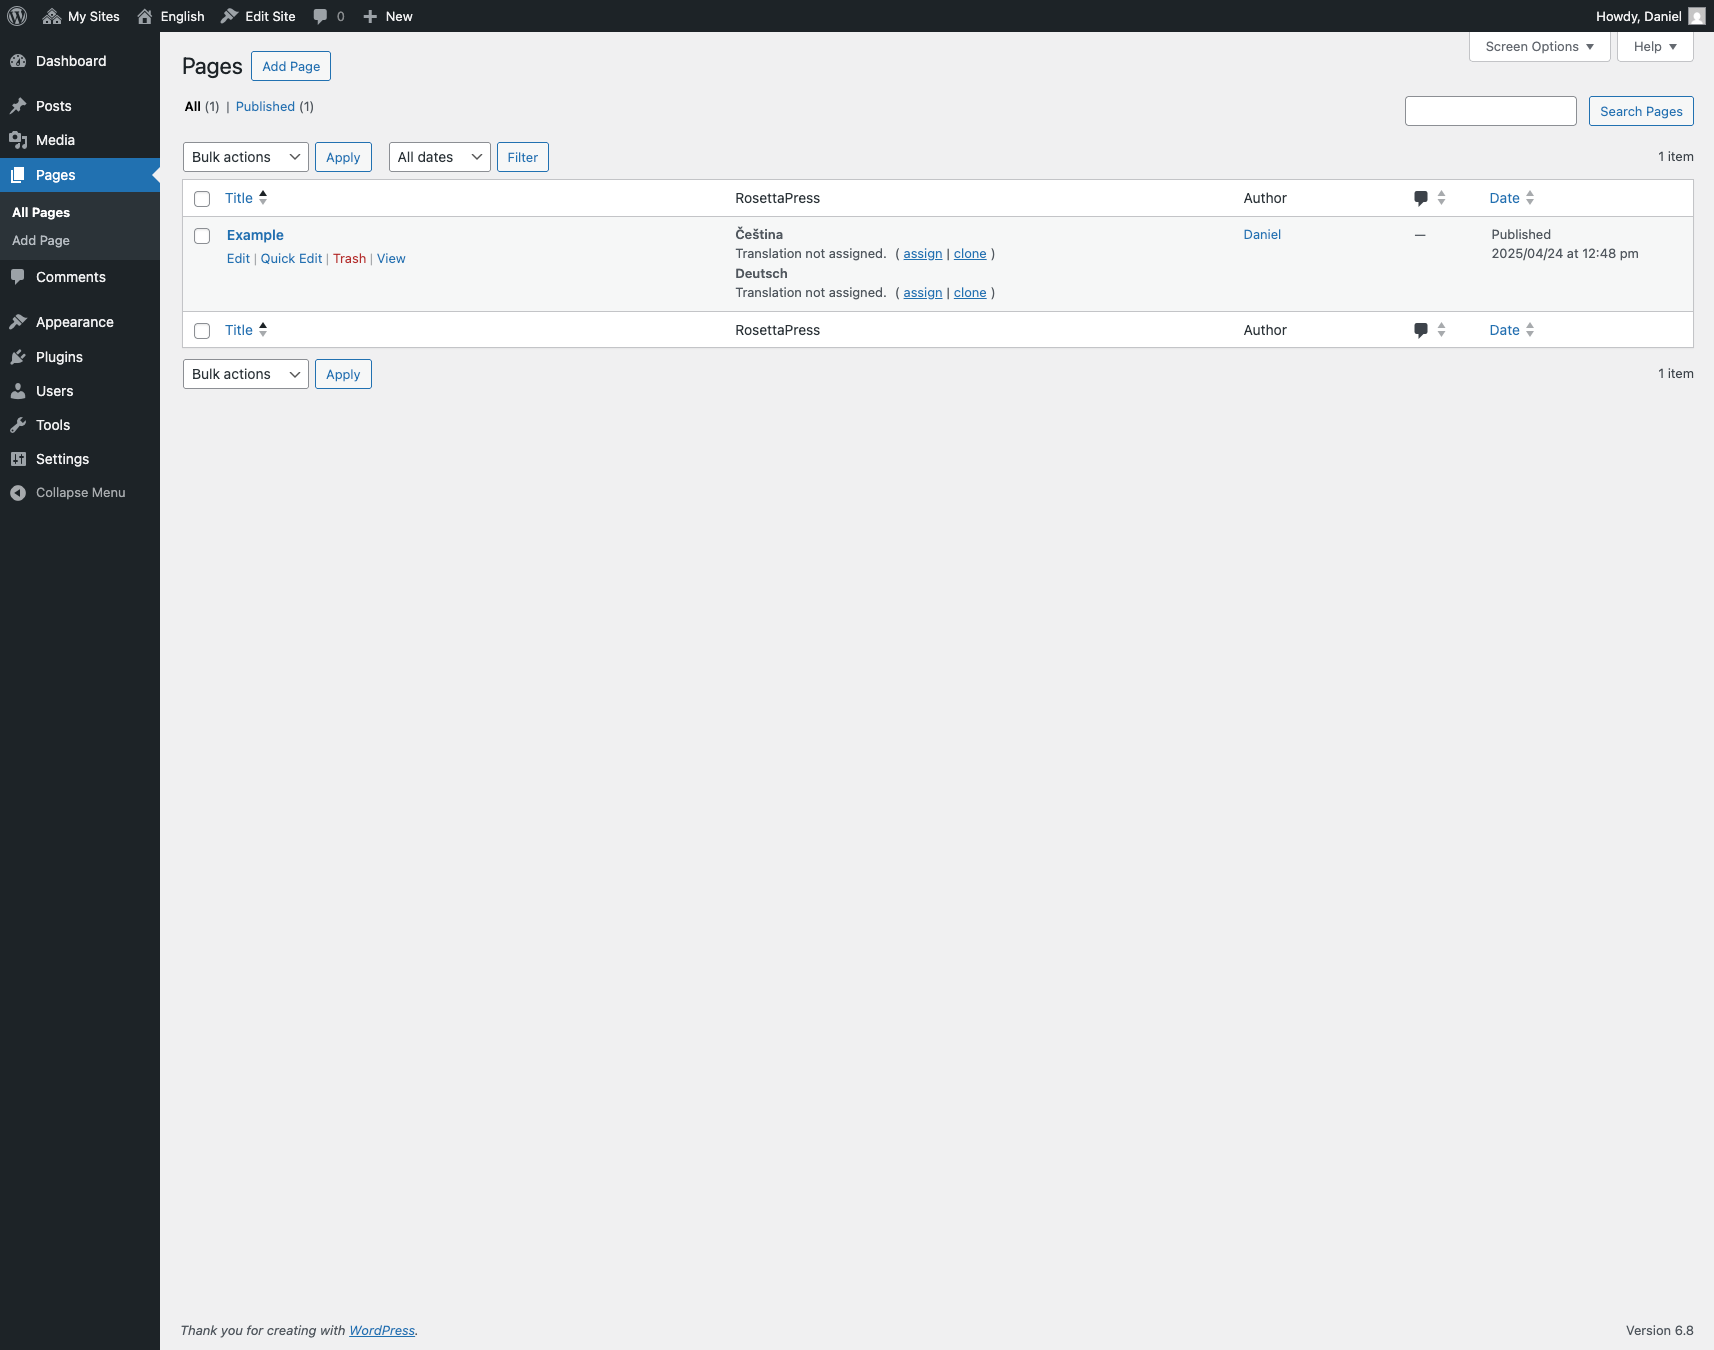
Once the page is created, go to RosettaPress → Pages. You’ll see a unified table that lists all sites and available translations for each page.
Each row represents one piece of content. You can either:
- Assign a page: Link an existing page on another site as the translation.
- Clone a page: Automatically copy the content to a selected site and link it as a translation.
Step 3: Translate and Publish
Once linked or cloned, visit each language site and adjust the content as needed. RosettaPress will handle the connection between versions, so changes to structure or media can be synchronized or kept independent depending on your settings.
You can repeat this process for any page or post type supported by your theme or plugins.
You’re now up and running with multilingual content! Next, you can explore translation synchronization, automatic translation tools, and content-specific settings for greater flexibility.